

This was so much prettier in my head. I thought I had figured out how to get smooth (not lumpy, pictured) frosting, but I thought wrong. I swear I sifted the sugar! Argh. I'm still going to eat it.
Do you want to know how to make a possibly lumpy, but EXTRA delicious, Super Mushroom/Strawberry cake? Read on...
Strawberry Cake
2 cups flour
1 cup sugar
1 TB baking powder
1 tsp sea salt
4 eggs
1/2 cup butter
1 cup pureed strawberries
1/2 cup milk
Preheat oven to 350°F. Butter (or spray) and flour 2 9-inch round cake pans or one 9x13 cake pan. Set aside.
Combine remaining dry ingredients (except sugar) in a large bowl. Cream butter and sugar in a separate bowl, beat remaining ingredients together. Add to dry, beating with a wire whisk. Pour into prepared cake pans. Bake the cake for 30-35 minutes or until done when tested with a toothpick.
This recipe comes from Whole Foods, and I was very happy with it. It was hard to find a strawberry cake recipe that did not use white cake box mix and/or Jello!
Vanilla Buttercream Frosting
1-1/2 sticks butter, room temperature
1/4 cup cream
1 teaspoon vanilla
2 cups powdered sugar, sifted
Beat butter briefly, scrape bowl.
Add the sifted powdered sugar and cream. Beat until smooth.
I was not so happy with this. I'm not sure what went wrong. Maybe I did not beat long enough? Maybe I accidentally put in too much cream?
Assembly
Cut the domed crust off the two cakes, leaving a flat surface.
Frost the bottom layer.
Slice a handful of strawberries into thin pieces and arrange them on top of the bottom layer.
Frost the bottom of the top layer then lay it on top of the bottom layer and frost it.
Put cake in the refrigerator to harden frosting.
Strawberry and Ganache Topping
Dice a handful of strawberries into small pieces and toss with red jam (to maintain color). With a butter knife, carefully sketch out the shape of the Super Mushroom into the frosting, then arrange the strawberries in the appropriate place.
In a(n improvised) double boiler, melt two bars of high quality dark chocolate (I like Callebaut). When fully melted, add cream until ganache is the desired consistency.
Let ganache cool a bit, then transfer to a ziploc bag and cut off the tip of the bag. Draw the outline and the mushroom eyes with the ganache.
That's it! Perfect for birthdays for eight year olds in the eighties (or lazy days for twenty something right now).
Tuesday, May 13, 2008
Super Strawberry Cake

Monday, May 12, 2008
Using All the Scraps

Geoff was working Saturday, so I spent my alone time on a bunch of little projects, like this skirt. The green part was already a skirt I own, and liked, and bought for $10 at Ross. The fabric is green with a white flower embroidered pattern on it. The problem was that the hem wasn't very nice; it was a semi-unfinished hem with only a serged edge.
I thought, this would look nice with a band of white satin at the bottom, and I wondered if I had any white satin. So I looked through my scraps, thinking I might have some satin left over from the White Mage project. While searching I happened to find the hem from my wedding dress; the seamstress had given me the excess when she shortened it.
Perfect! Heck, it was already hemmed, I just had to attach it. I think it really adds something to the skirt, and it's good to use all your scraps, especially the sentimental ones.
Getty Sunday

Geoff is having a tough time at work lately, and working almost all the time, so we needed to do something fun and easy on Sunday to help him relax. Decided to go to the Getty, which as a museum is honestly a bit whatever but the location is wonderful.
There was an awesome beetle thing in the lobby, that we rescued.
Ivy!
The tram was very crowded, so we walked back down. It is a very nice walk, I recommend it.
Flower!
Wednesday, May 7, 2008
Sakura Lights
Craftster challenges come up with great things. Check out these sakura lights by sf craftster.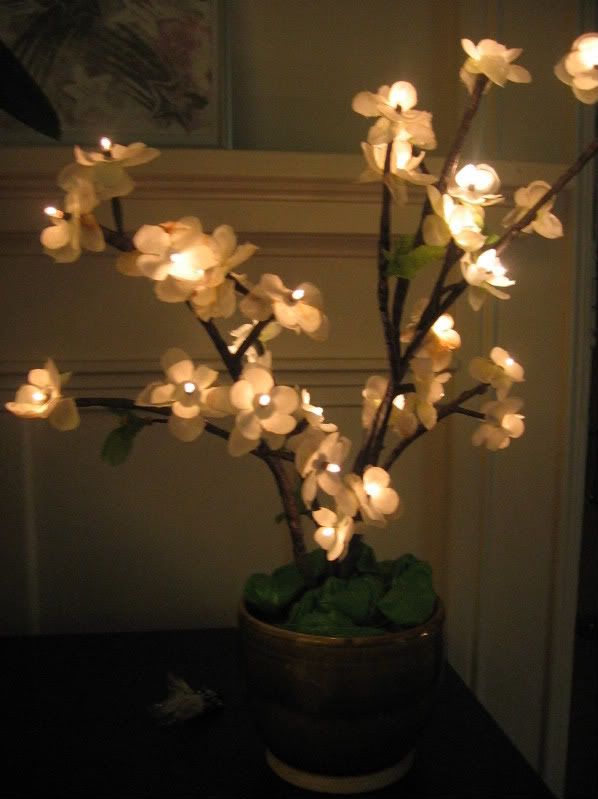
A side note: When I google image searched "sakura" some Naruto/Sakura shipper fan art came up, and I threw up a little bit in my mouth. Sorry fan art person, I ship for Naruto/Hinata and Rock Lee/Sakura ;)
Monday, May 5, 2008
Make a fabric ranunculus

OK, this doesn't have to be a ranunculus, it could be any poofy flower, but ranunculus does actually come in this color so I'm calling this a ranunculus. Also, ranunculus is fun to say.
This is inspired by the flower in Sew Subversive (I think) but its poofier.
1. Cut several circles out of woven fabric; I used about ten. First circle should be about 20% bigger than you want the width of the final flower to be, and then subsequent circles should descend gradually in size. 2. Cut the edges of the circles with scalloped scissors or pinking shears. 3. Cut a small circle out of the middle of each circle of fabric, each cut should be the same size. 4. Baste around the edge of the inner circle of each piece of fabric, then pull the thread tight so that the fabric scrunches up evenly. 5. Sew all the pieces together and attach a fabric covered button to the center (for info on making a fabric covered button, please see this tut) |

These work great as decorative accents or brooches, and are fun stash-busters.
Friday, May 2, 2008
Flowers Swapped

I sent off my first Craftster swap a few days ago, for the Flowers swap, and it arrived today. One medium and two smalls. I had a lot of fun doing this and when I have more time I've got to do another!
Oh my gosh. Is that... is that a toilet paper cozy? Jessica, do you have a problem? Do we need to send you to TP Cozies Anonymous?
I made this out of Dr. Girlfriend and the Monarch scraps, and for some reason I'm really proud of that. The pink is from her dress, and the orange is from his wings. The ribbon I bought for the dragon pillows before I decided to embroider them, and the button is something I bought for my wedding dress but did not use. So no, I don't have a problem; I spent $0 on this (and I also got to practice my button holes).
I'm going to post a HOWTO about making the flower, since I really like how it came out.
Pretty pretty recycling. This vase used to be an awesome bottle of vinegar. It's my first experiment with glass paint, and I wish I had used a natural brush as recommended so it wouldn't be so thick and streaky. But I still like it. The flower in there is now quite dead, and I didn't make any flowers to put in it, but I recommend a few buds of Gerbera daiseys, like so.
Note cards from a painting I made of the flower above. I really love watercolor, it prints up so nicely. These were also a stash buster, made from the leftover paper from my wedding invitations.
I sorta considered sending her my leftover wedding invitations themselves, but that would be such a cheat, right? Yes. Now I have to decide what to do with the actual painting. I wonder if my mother would like it for Mother's Day - she could put it on the fridge, like old times.
Airstream Alchemy

I made this card on commission through Etsy's Alchemy, which is a pretty cool service. It's inspired by an old Airstream trailer.
The front is made with Stardream paper, one of the fabulous papers you can buy relatively cheaply at Paper Source in Beverly Hills. 
This was a fun drawing to do. I like working with heavy blacks because it hides my deficiencies in line quality. I can draw, I just can't ink so good, no da?
Monday, April 28, 2008
Not a Three Hour Shirt

Chugging along on the cosplay. This is Baltar's shirt, inspired by this picture. I used McCall's 4079, a so-called "three hour shirt." Not! I admit this is the first time I've used an official, commercial, tissue paper pattern, but this wasn't even close to three hours.
Using a pattern was very helpful. I don't think I could have done the collar without it (and I barely managed with it). But the fit on this was a bit silly. The collar fit perfectly, but I had to cut several inches off the side. What kind of weirdly proportioned, tiny necked, huge chested person is this designed for...? I guess that's the unisex aspect.
A note on buttons: I am a crazy person! When Geoff was trying on the shirt, he said, "It's a little hard to button what with the holes being sideways." And I realized that I have always made button holes the wrong way. I don't know why, but for some reason I've never noticed that button holes run vertically. Ah, so that's the button hole guide has two lines. And that's why the buttons are always bunching (see above). Yes, I repeat: I am a crazy person.
Friday, April 18, 2008
Bag First
An awkward reality of conventions is that you need a bag, because unlike people on TV, you need to have a wallet and a phone and a camera and stuff on your person when walking around all day. Your costume may not provide one. Calliel on Craftster sums up the dilemma well here (and solves it pretty fantastically, too).
The character I'm doing this year* does at one point carry a briefcase, but never with this costume, so I decided to just go the matching bag route. Last year I did a matching bag (you can see it here) but I did it very last minute. This year I decided to do the bag first.
(Wow, this red is really hard to photograph!)
It's not perfect by any means. I was having much trouble with my bobbins-- turns out, do NOT use Class 66 bobbins with a Brother machine-- so there are tangled threads and bad tension problems all over the place, but I'm fairly happy with it. This is the first bag I've really tried to construct. It has a zipper and stabilizer and lining and all that good stuff - whereas last year I just made a fold-over tote with a cardboard magazine file in it for structure (I'm serious).
Check it out, shiny lining and all. No magazine file this year. Now I just need to get on with the dress and the jewelry and stuff. You know, the actual costume...
*No I haven't told you what character - you can guess if you want ;)
Friday, April 11, 2008

Tuesday, April 8, 2008
Long Throw Pillows

So thanks to Jelly Wares, I felt confident making these two pillows not match. I think it actually works pretty well. Anyway, I am too busy working on my next cosplay to fix it right now, so I stuffed them this weekend and this is how they will stay.
Inspired by images of Chinese dragons chasing pearls, I made these appliques to dress up my lackluster Target pillows. I've never made an applique before... this may be apparent. I used an awesome calico quilting fabric from Joann called Snakeskin. It looks like scales up close. The satin pearl is made from my scraps pile, and it is exactly the size of a spool of thread, imagine why.
Some people like to call Chinese dragons long, the Chinese word, to separate them from Western dragons. Although similar in appearance, they are very different mythologically. The long is not villainous or frightful, it is a symbol of power. The pearl it chases symbolizes prosperity. My husband would also like to point out that the one on the left is an "S" so he thinks that this design is now our family crest or something.
I added some more stuffing to the pillows while I was at it, because they were a little flat, and inserted a zipper, because these pillows were pretty tough to make, I want to be able to wash them.
Monday, April 7, 2008
Flesh Tank! TP Cozy

I've demonstrated a fondness for kitschy cozies, so add this one to the list.
I made this one for a friend who is a huge Narutard Naruto fan. I made it for Christmas but I only got around to photographing it now. It was kind of hurried, so I had to give it to him before I got to photograph it, and also before I was able to, um, buy thread in matching colors. Yeah.
This character's name is Choji. Choji is a kid that everyone underestimates because he is fat and sweet natured, but he is a tough cookie. His main attack is called Flesh Tank in the Hong Kong version I've been watching; he can turn his body into a giant bowling ball and steamroll his foes. I think it is translated as something else in the Cartoon Network version but you get the idea.
So it's his giant bowling ball form that conceals the toilet paper. His body is made out of various scraps from the remnant bin. His hair is made out of the same yarn as the White Mage above. His face, feet, hands, and Leaf village symbol are made out of polymer clay. Have I mentioned how awesome Fimo is?
Tuesday, April 1, 2008
Craftster Challenger

I just entered the latest Craftster challenge, the Dollar Store Round 2. My entry is here.
Craftster is addicting. Consider yourself warned!
UPDATE: Voting is now open. Vote here.
UPDATE 2: Voting is over. The dollar store wedding dress won, clearly. Wow! I'm so proud that 15 people voted for me when stuff like this was in the running. Congrats to everyone, and thank you!


